HDTR | High Dynamic Time Range Images
capturing the flow of time in a single frame
download
The tutorial takes you through the creation of an HDTR image from a stack of 4 images.
Gradient layer masks are used to achieve an HDTR effect.

making HDTR images with photoshop
A reader recently sent me the following.
Am I missing something here? This is interesting and a concept I have played with and seen others also do, on occasion, to some success. I've read through some of your methods but they seem incredibly complex. Can not the same be achieved with just a few images and careful use of gradient masking techniques in Photoshop?
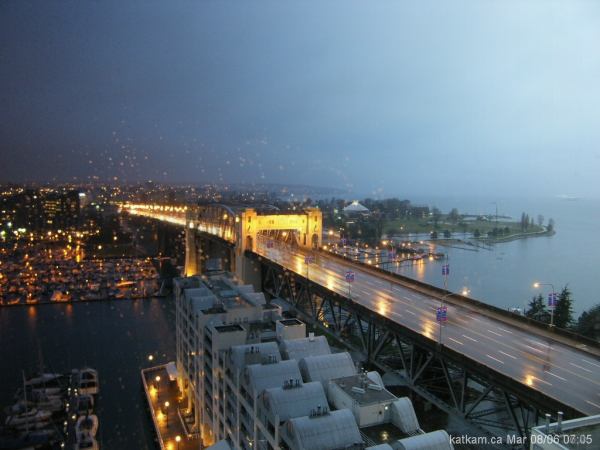
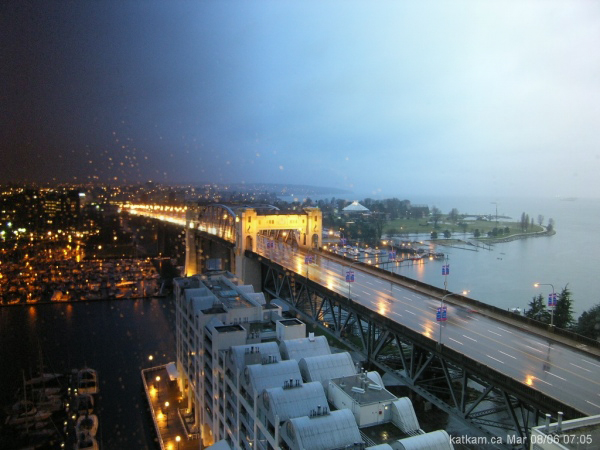
I mean here is a link to a file I created in 60 seconds with just 3 pictures of the Burrard Street Bridge. This method give you none of the problem banding etc and I guess covers a much coarser time interval so it's a philosophically different thing but still I believe you could achieve the same result with likely far far less work?
Indeed if you set up and save a series of gradient masks in photoshop to suit a certain number of images I believe you could easily make an action to almost fully automate the process.
—JS
This motivated me to create this tutorial section to show you how to create simple HDTR images with Photoshop in just a few minutes. If you've skimmed through the methods section, which describes how I create the HDTR composites, you would have seen that HDTR is based on what in Photoshop is called layer masking. By adjusting the layer masks (its opacity) for each image, you can stack the images and have the right image show through at the right position in the image.
Using Photoshop is easy, but can be very tedious when your input image stack contains 100's of images. As JS points out, you can generate the layer masks once and then use actions to load the images and apply the masks. I'm sure this is true, though I don't have enough experience with complex actions to achieve this off the top of my head.
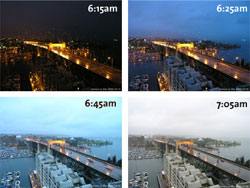
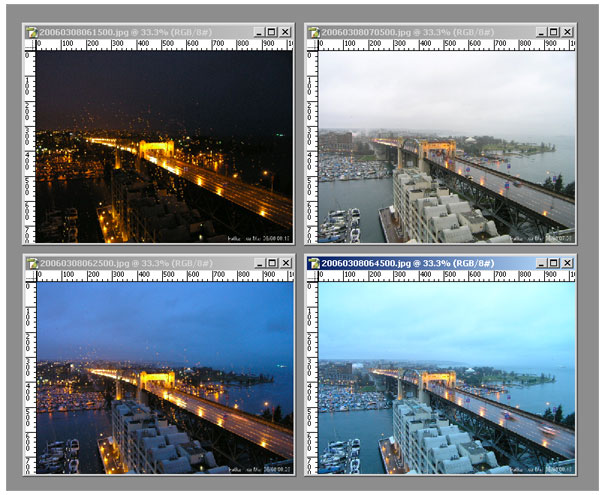
To get the tutorial going, consider the stack of four images shown below (download images)
These images are from 8 Mar 2006 and show the start of the day. The white balance in the web cam shifted sometime between 6:45am and 7:05am causing a large change in the color balance between the third and fourth image.
First, load the images into Photoshop. You'll find that each image is in its own window and we will need to combine the images into one document to be able to work with them as layers (download final Photoshop file (8 Mb)).
Pick one of the images as the target document, and move the other images into it. To move another image onto the target document, click on the image you wish to move (this makes it the current document), press "v" (move tool), and then click on the image and drag and drop it onto the target document while holding the shift key. By holding the shift key while moving an image from one document to another you are asking Photoshop to place the moved image in the same relative position within the target document as in the source document. Thus, the images will be sitting on top of each other, co-registered, no matter at which point you released the mouse button.
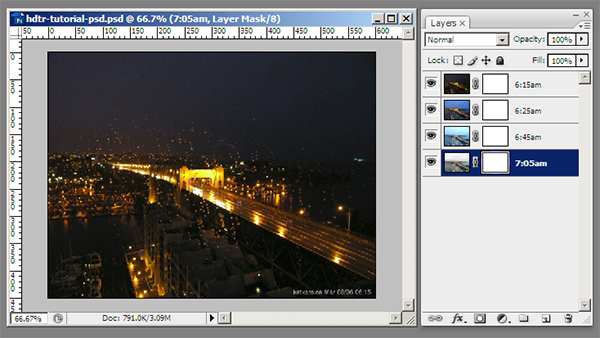
Once you do this will all four images, you'll have a single document that looks like this.
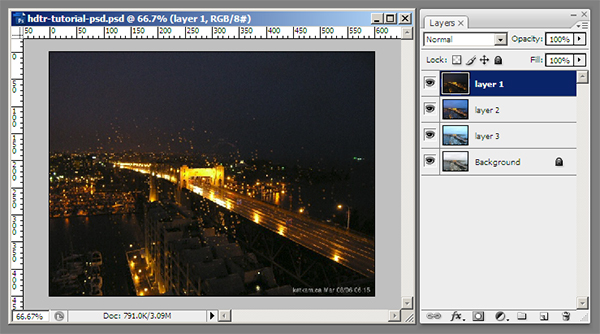
Notice that Photoshop keeps the image in the target document as the background and puts all the other images you've moved into the document as new layers. They get unoriginal names like "Layer 1", "Layer 2", and "Layer 3". At this point it's convenient to rename the layers to something you can interpret, like the image time. I've done this, as shown below. To rename a layer, double click on the layer name in the layer palette and enter the new name. Notice that once you rename the background layer to anything other than "Background" it will no longer have the background lock on it (this lock frustrates a lot of users).
After renaming the layers, re-order them by dragging and droping the layers in the palette until the layer order is what you want. For this example, I've made the layer stack go from earliest (6:15am) to latest (7:05am).
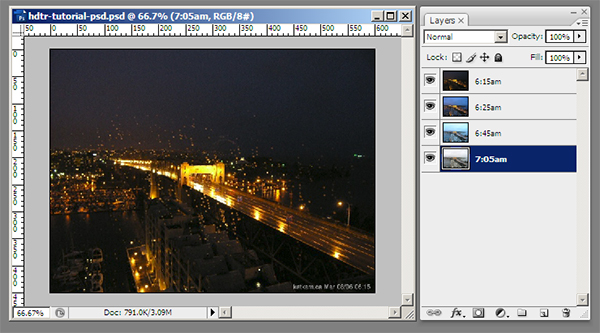
At this point, the top layer obscures all layers below and all you see is the 6:15am image. We'll soon be fixing this, with layer masks, so that other layers peep through.
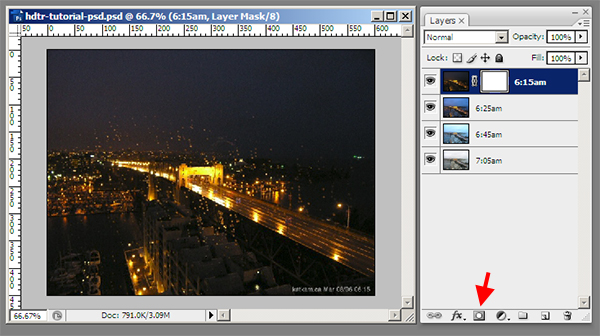
Now, let's make the layer mask of the first image. Select the topmost layer and click on the "Add layer mask" icon, found at the bottom of the layer palette (third from the left). This will create a layer mask, which is by default white (the layer shows through everywhere).
Repeat the mask creation step for each layer.
Now select the gradient paint tool (hit shift-g until the gradient icon appears in the toolbar palette). Select the linear gradient from the gradient choices and pick the foreground-to-background gradient. My foreground color is white and background is back, so the gradient is white-to-black.
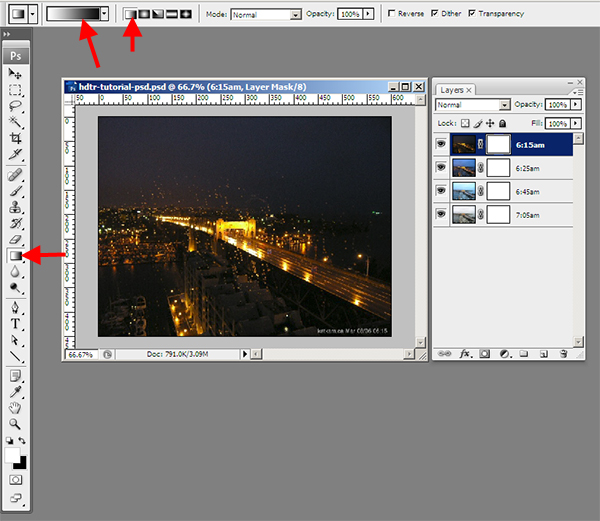
Now to business. Select the mask of the first layer (click on the mask icon), and paint a gradient from white to black on the left side of the image. Do this by left clicking to set the start point of the gradient and dragging (I suggest horizontally, and here you can hold shift to restrict motion) to the end of the gradent.
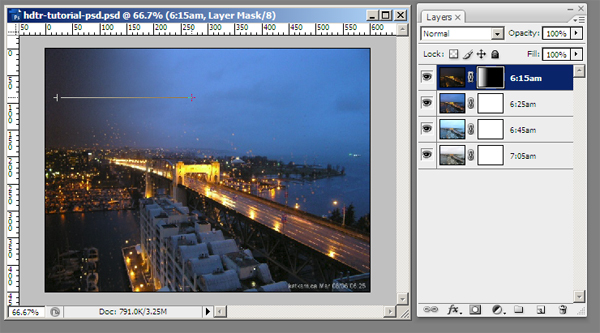
The mask now occludes the first layer for most of the image, except where the mask is white. Repeat for the other layers, each time starting the gradient further to the right.
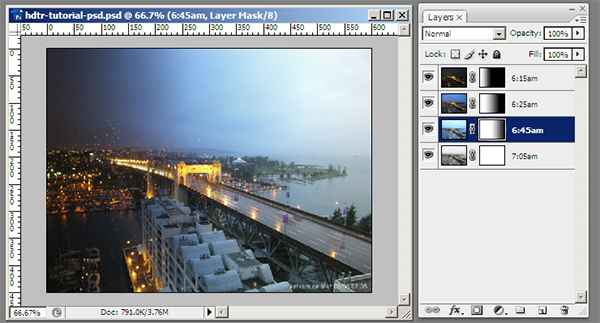
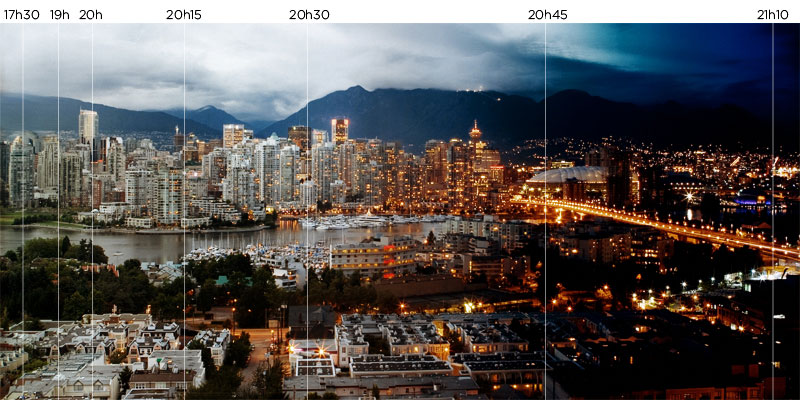
Below is the final 4-layer HDTR image.
addendum
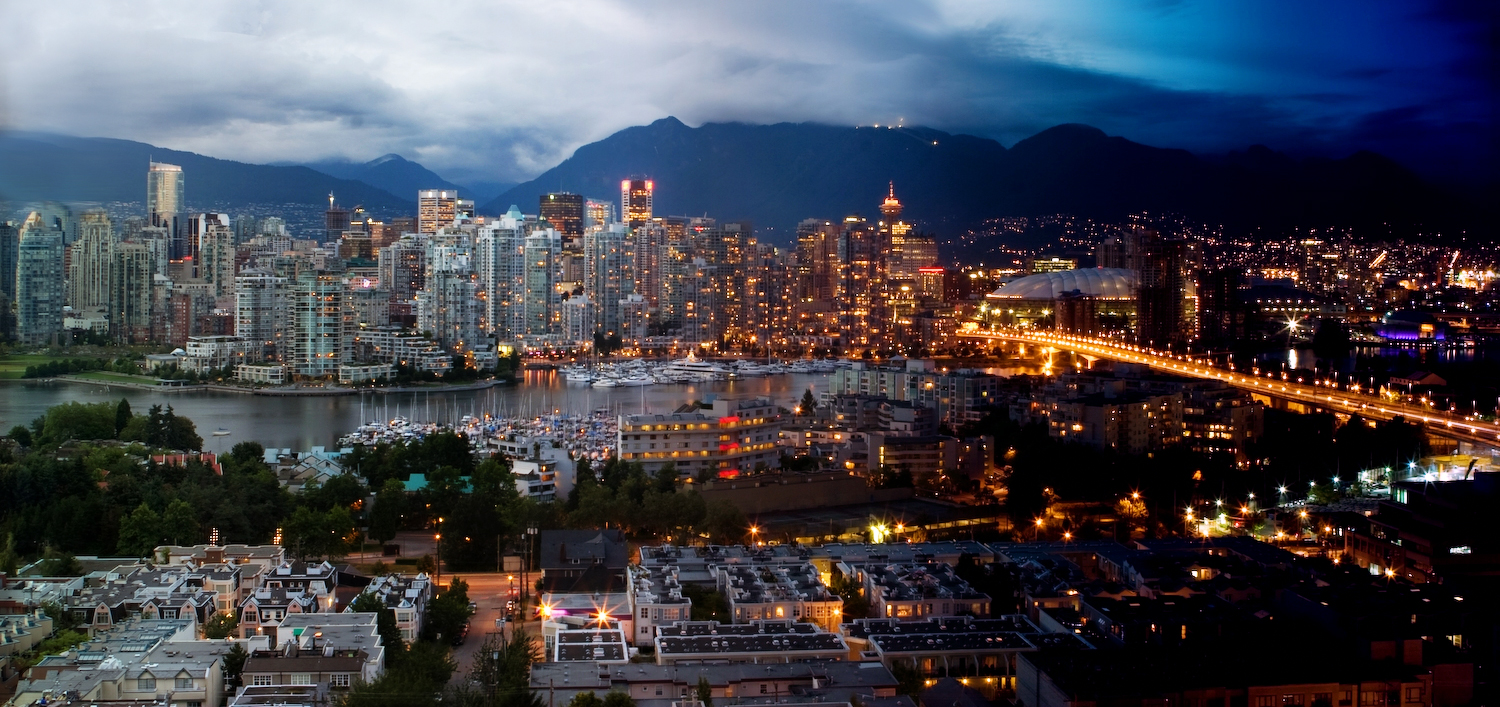
If your gradients have a harsh transition, you can smooth them out by applying a blur to the gradient mask. Select the gradient mask of any layer and apply a Gaussian blur (Filter > Blur > Gaussian Blur).
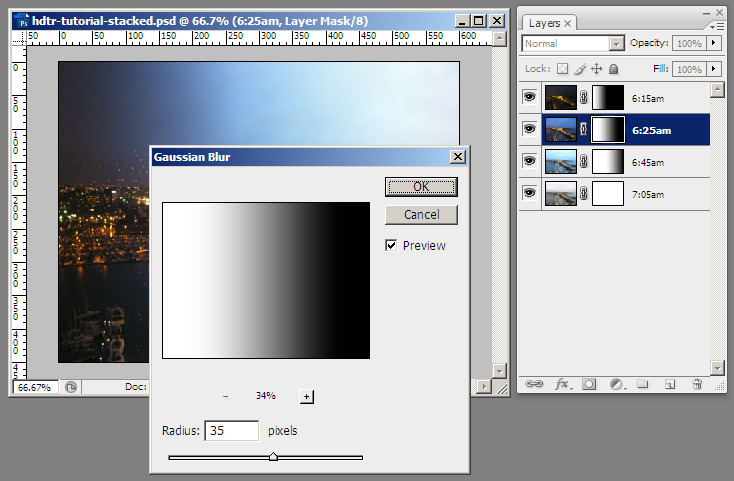
By adjusting the size of the effect you can smooth out the gradient. You can achieve similar results by exploring other Blur filters. In the image below, each gradient had a 150px Gaussian blur applied to it.